Większość naszych masztów przyściennych instaluje się z użyciem kotew chemicznych i prętów gwintowanych. To bardzo wygodna i wytrzymała technika, niemniej wrażliwa na błędy wykonawcze. Reakcje na szpilkach szczególnie w przypadku wyższych i bardziej obciążonych masztów sięgają wartości liczonych w tonach, zatem jakość mocowania jest sprawą kluczową.
Uwaga ogólna – jeśli nie jesteś profesjonalnym instalatorem lub inżynierem budownictwa – zastanów się nad zamówieniem opracowania statyki masztu i sposobu kotwienia dopasowanych do konkretnej ściany z którą będziesz pracował. Znaczne siły jakie mogą powstawać na mocowaniach mogą zaowocować zarysowaniem lub w skrajnych przypadkach wyrwaniem kawałka ściany wraz z poprawnie wykonanym kotwieniem. Niektóre ściany nie nadają się do instalacji większych masztów przyściennych w ogóle, inne zaś wymagają innych technik (np. skręcenia ściany techniką „na kanapkę” tj. od wnętrza budynku instalowany jest ceownik zwrócony półkami do pomieszczenia, podobny jest umiejscowiony na zewnątrz i całość skręcona jest przelotowo szpilkami gwintowanymi – bez użycia kotew). Taki sposób montażu pozwala ominąć problemy ze ścianami niestabilnymi (np. wilgotny gazobeton) lub nieprzewidywalnymi (różnego typu pustaki i cegły wykonane z żużlów prasowanych lub spajanych cementem – technika popularna w latach 70-tych XX wieku). Ceowniki rozkładają obciążenie na zdecydowanie większą powierzchnię nie kumulując obciążeń punktowo.
Jeśli jednak uda się ustalić, że ściana spełnia minimalne wymogi wytrzymałościowe dla danego masztu oraz kotew chemicznych – pozostaje poprawne wykonanie kotwienia, co jest pozornie łatwe – lecz wymaga znajomości technik i dochowania staranności wykonawczej.
Poniżej znajdziesz praktyczny poradnik montażu masztów przyściennych z użyciem kotew chemicznych (żywic iniekcyjnych) w murze i betonie. Tekst prowadzi „od A do Z”, poprzez przygotowanie otworów, dobór osprzętu, omawia czasami wiązania w kontekście temperatury zewnętrznej i wspomina o kontroli jakości.
Uwaga prawna: „Prawo budowlane” wymaga natomiast stosowania wyrobów z deklaracją właściwości użytkowych (CE/DWU) oraz montażu zgodnie z zasadami wiedzy technicznej i instrukcjami producenta (ETA/EAD, EN 1992‑4). Minimalne odległości i głębokości wynikają z aprobat/ETAs konkretnych systemów kotwiących. AluPro nie zaleca stosowania rozwiązań żadnego konkretnego producenta. Poniższy tekst jest kompilacją wiedzy praktycznej, oraz informacji z kart produktowych różnych dostawców kotew chemicznych. Należy pamiętać że w przypadku konfliktu opinii pomiędzy instrukcją wykonania kotwy dołączoną do produktu a tym poradnikiem – pierwszeństwo zawsze ma instrukcja producenta kotwy.
- Dobór systemu i osprzętu, bazowe wskazówki wykonawcze
Najczęstszym rozróżnieniem są ściany pełne (beton cegła) i takie które mają różne wolne przestrzenie np. zaplanowane – jak pustaki, lub chaotyczne – jak gruzomur (miks gruzu ceglanego z niezawibrowanym betonem – często stosowany tuż po wojnie w Polsce). W pierwszym przypadku stosujemy wiercenie udarem otworu większego o około 2 mm od średnicy wklejanej szpilki, w drugim przypadku OBOWIĄZKOWO stosujemy koszyki dla kotew chemicznych (plastikowe lub metalowe z metra). Generalnie AluPro zaleca by nie stosować szpilek krótszych niż 150 mm dla połączeń mało obciążonych i 250 mm dla połączeń silnie obciążonych. Jest to więcej niż wartości katalogowe – ale praktyka wykonawcza wskazuje, że początek szpilki (przy powierzchni ściany) rzadko jest poprawnie sklejony masą z otworem i dopiero od 2/3 głębokości połączenie jest pełne. Ważne by pamiętać o zapasie szpilki tj po założeniu mocowania, podkładki i przykręceniu nakrętki – poza nakrętkę muszą wystawać minimalnie 3 zwoje gwintu (lub więcej, to kwestia estetyki). Zaleca się stosowanie nakrętek samohamownych, szczególnie jeśli występuje ryzyko wibracji (np. wzbudzenie się konstrukcji kratownicowej na wietrze).
W większości przypadków otwory wiercimy wiertarkami udarowymi z uchwytem SDS, niemniej w przypadku pustaków (szczególnie MAX) unikamy używania udaru. Udar niszczy wewnętrzną strukturę pustaka do punktu w którym kotwa może nie trzymać się nawet z zastosowaniem koszyka, gdyż wewnętrzne przegrody pustaka są połamane/pokruszone.
Kluczową sprawą jest dobre wyczyszczenie dna odwiertu z pyłu. Pył w otworze jest najczęstszą przyczyną nieudanych wklejek (sytuacja w której kotwa mimo upływu czasu w momencie dokręcania nakrętki zaczyna się obracać w otworze i z niego wychodzi). Otwór należy czyścić poprzez wprowadzenie igielitu aż do dna otworu i przez ten igielit otwór przedmuchać sprężarką przenośną – aż całkowicie przestanie kurzyć.
Po wprowadzeniu chemii do otworu szpilkę wkładamy ruchem obrotowym (tak jakbyśmy ją wkręcali) – to znacząco poprawia połączenie metal-kotwa. Można szpilkę przed wkręceniem „pobrudzić” chemią przez jej wtarcie w gwint – co dalej polepszy połączenie. W czasie wkręcania może zdarzyć się sytuacja w której istniejące bąble powietrza wypychają szpilkę mimo jej wciskania (efekt strzykawki z zatkanym wyjściem). Jest to wynik błędu wykonawczego polegającego na wstrzyknięciu chemii nie od dna otworu a np. od połowy jego głębokości. Sytuację może poprawić kilkukrotne wyjęcie i włożenie szpilki w otwór z nadzieją że kieszeń powietrzna znajdzie ujście, ewentualnie dostrzyknięcie chemii głębiej.
Prowadząc prace przy kotwieniu należy pamiętać o dwóch sprawach. Kotwy wyposażone są w specjalne miksery kotwy dwuskładnikowej. Pierwsze kilkanaście mililitrów kotwy nie jest dobrze wymieszane i nie stworzy poprawnego wiązania. Należy upuścić je poza otworem. Ilość łatwo poznać po kolorze. Na początku widzimy przewagę któregoś składnika, po chwili kolor się stabilizuje – to moment w którym możemy zacząć injekcję.
Po skończonej iniekcji należy na odrobinę kartonu odłożyć kolejne kilka mililitrów mieszaniny jak tzw. „świadek”. Możemy na jego podstawie obserwować proces solidyfikacji kotwy. W chwili gdy świadek w pełni stwardnieje – możemy myśleć o wstępnym obciążeniu połączenia. Docelowe obciążenie jest możliwe z reguły po około 12 godzinach od wykonania kotwienia. Temperatura zewnętrzna silnie wpływa na ten czas, w szczególności na tężenie świadka. W związku z powyższym rynek dostarcza kotwy „letnie” do pracy w temperaturach powyżej ok. 10 stopni Celsiusa oraz „zimowe” do pracy poniżej tego progu. Warto zwrócić uwagę na ten aspekt bo zastosowanie zimowej kotwy w lato jest problematyczne, proces tężenia może i z reguły zaczyna się dziać już w czasie „wkręcania” szpilki co zaburza polimeryzację i obniża jakość finalnego połączenia, w skrajnych przypadkach nie pozawala na finalizację instalacji szpilki. Pobocznym aspektem jest bardzo szybkie tężenie kotwy w mikserze co wyklucza zastosowanie jednego miksera dla kilku otworów.
Podsumowując kluczowe aspekty:
Podłoże:
- Mur drążony (dziurawka, pustaki, bloczki z otworami): kotwa chemiczna + koszyk (tuleja siatkowa). Wiercenie bez udaru (tryb rotacyjny).
- Mur pełny (cegła pełna, beton komórkowy, bloczki pełne): kotwa chemiczna, zwykle bez koszyka. Wiertarka rotacyjno‑udarowa dopuszczalna (wg zaleceń producenta).
- Beton (zwykły): kotwa chemiczna bez koszyka; wiercenie udarowe lub wiercenie z odsysaniem pyłu / wiertłem rurowym, zgodnie z instrukcją.
Żywica (przykładowo):
- Vinylester/hybryda – szybkie wiązanie, szeroki zakres temperatur, montaż w murze i betonie.
- Epoksyd – najwyższe nośności i dłuższe czasy tężenia, rzadziej wybierany przy zastosowaniach przy instalacji masztów przyściennych.
Pręty/szpilki:
- Gwintowane M10–M16 (typowo M12 do wsporników masztów), klasa 8.8 lub nierdzewne A2/A4 na zewnątrz. Klasa i grubość szpilki jest elementem opracowania techniki kotwienia – wymaga konsultacji z inżynierem statykiem
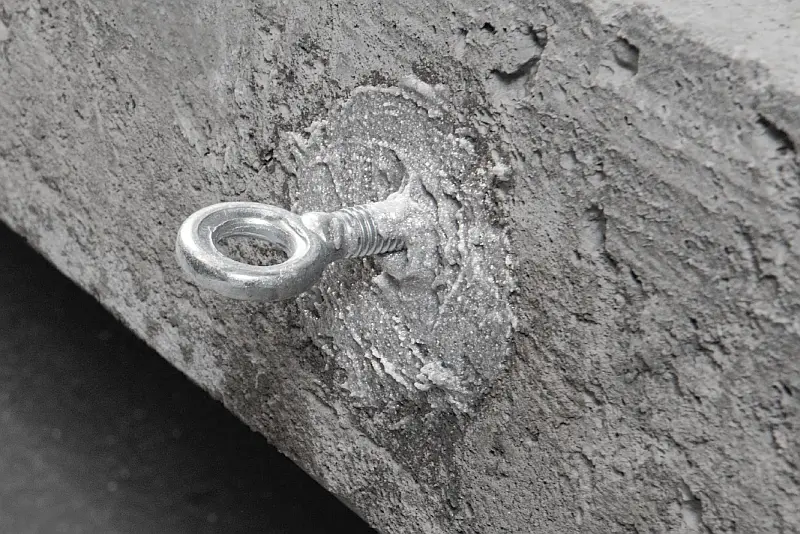
- Mocowania masztów przyściennych produkcji AluPro posiadają wykonane otwory pod szpilki, otwory te są z reguły o 2 mm większe od sugerowanego rozmiaru szpilki tj. przykładowo dla szpilki M12 otwór 14 mm i tak dalej.
- Uwaga praktyczna – warto użyć mocowania masztu jako szablonu do odwiercenia otworów w ścianie. Po wprowadzeniu chemii do otworów – można wkręcić szpilki już z założonym mocowaniem – co gwarantuje brak problemów z rozstawami, niemniej jest kłopotliwe o tyle że mocowanie masztu musi być przytrzymywane do chwili wstępnej solidyfikacji miksu.
- W przypadku gdy mocowanie masztu zostanie zdjęte ze ściany przed wklejeniem szpilek, zaś szpilki nie trzymają poprawnie rozstawów (wklejenie pod kątem, zbyt duże otwory w stosunku do średnicy szpilki) może zdarzyć się że założenie mocowania będzie trudne lub niemożliwe. Rozwiązania są dwa: niezalecane tj rozwiercenie otworów w mocowaniu masztu na większy, lub po pełnym związaniu kotwy podgięcie prętów młotkiem tak by pasowały do otworów mocowania. W przypadku podginania warto pamiętać by wszelkie uderzenia robić przez nakręconą na koniec szpilki nakrętkę – co chroni gwint szpilki przez uszkodzeniem Uszkodzenie gwintu jest poważnym problemem, bo wklejonej szpilki nie da się usunąć, ewentualne ponowne przegwintowanie (o ile możliwe) zniszczy ocynk co doprowadzi do przyspieszonej korozji. Podsumowując: warto uniknąć sytuacji wymagającej zginania wklejonych szpilek, jeśli to konieczne – tylko po zabezpieczeniu gwintu nakrętką.
Akcesoria:
- Tuleje siatkowe (koszyki) do podłoży z pustkami (długość dopasowana do głębokości otworu). Zalecamy tuleje z siatki metalowej cięte z metra. Tuleje plastikowe z reguły mają zbyt małą głębokość w stosunku do sugerowanych standardów. W koszyku metalowym należy pamiętać o zakorkowaniu wylotu tulejki albo poprzez specjalny korek plastikowy albo poprzez zagniecenie i zrolowanie końcówki. Warto uważać by nie zniekształcić okrągłości tulei w czasie zagniatania gdyż utrudnia to wprowadzenie jej do otworu.
- Sprężarka przenośna, końcówka do przedmuchiwania sprężonym powietrzem, rurka igielitowa lub stalowa długa
- Szczotki do czyszczenia otworów – nie zalecane, choć istnieją. Stosować w przypadku braku możliwości wyczyszczenia otworu sprężonym powietrzem.
- Pistolet do kartuszy i zapas tak zwanych mikserów – z reguły da się jednym mikserem wprowadzić chemię to kilku otworów, ale zasada bezpieczeństwa mówi – jeden planowany otwór = jeden mikser.
- Planowanie rozstawu i odległości (s, c, hef)
W większości przypadków wykonane mocowanie masztu narzuca rozstaw otworów, tak więc jedyną kwestią jest podjęcie decyzji jak blisko krawędzi ściany można wykonać ostatni otwór by miał on swoją nośność – o ile w danej sytuacji to ma zastosowanie i znaczenie. W szczególnych przypadkach instalator musi zadbać zarówno o minimalną odległość między otworami jak i odstęp od krawędzi. Sprawę tą regulują zalecenia Europejskiej Oceny Technicznej i warto wiedzieć o proponowanych wartościach minimalnych. Ich zachowanie gwarantuje pełną wytrzymałość każdej kotwy bez współzależności wytrzymałości z kotwami sąsiadującymi.
Definicje:
- hef – efektywna głębokość zakotwienia pręta.
- s – rozstaw między osiami kotew.
- c – odległość osi kotwy od krawędzi.
Zasada ogólna: korzystaj z ETA (European Technical Assessment / Europejska Ocena Techniczna) i tabel producenta dla konkretnej żywicy i średnicy pręta. Poniżej typowe wartości startowe (dla betonu – przykładowe, orientacyjne):
|
Gwint |
Średnica otworu d0 |
s_min (min. rozstaw) |
c_min (min. odległość od krawędzi) |
|
M8 |
10 mm |
40 mm |
40 mm |
|
M10 |
12 mm |
70 mm |
70 mm |
|
M12 |
16 mm |
90 mm |
90 mm |
|
M16 |
20 mm |
150 mm |
150 mm |
Mur (cegła/pustaki): wartości często większe niż w betonie i zależą od typu bloczka i koszyka. Przyjmij na start: c_min ≥ 100–200 mm, s_min ≥ 200–250 mm, chyba że ETA danego systemu dopuszcza mniej. Zawsze sprawdź grubość ścianki i układ pustek.
Tip: Wsporniki masztów montuj tak, by otwory nie trafiały w spoiny lub komory pustaków o bardzo cienkich ściankach. Jeśli nie da się tego uniknąć – użyj dłuższego koszyka lub zmień rozstaw (jeśli możliwe).
- Obliczenie długości pręta (szpilki)
Zasadniczo długość pręta ustala się empirycznie i zalecenie AluPro zostało opisane w punkcie porad praktycznych. Generalnie zalecamy minimalną wartość 150 mm dla szpilek M10-M12 i niskich obciążeń i 250 mm dla szpilek M16-M20 i dla wysokich obciążeń. Problem niemniej jest opisany w literaturze fachowej – poniżej krótkie podsumowanie teorii.
Wzór praktyczny:
Gdzie:
- hef – wg tabel producenta (typowo: M10 ≈ 60–90 mm, M12 ≈ 70–110 mm, M16 ≈ 80–125 mm w zależności od systemu i podłoża).
- t_uchwytu – łączna grubość podstawy/wspornika + ewentualnych podkładek dystansowych.
- t_podkładki+nakrętki – przyjmij ~15–20 mm dla M12 (nakrętka + podkładka).
- zapas – min. 2–3 zwoje gwintu poza nakrętką (ok. 5–8 mm dla M12).
Przykład (M12): hef 100 mm + płyta 10 mm + (nakrętka+podkładka) 18 mm + zapas 6 mm ⇒ L ≈ 134 mm → zamawiamy M12×140.
- Wyznaczenie i wiercenie otworów
Tu sprawa jest intuicyjna i już częściowo opisana powyżej. Jeśli to możliwe użyj mocowań jako szablonu do wykonania otworów, użyj poziomnicy by zapewnić pionowość konstrukcji w czasie przymiarek, pamiętaj by poziomnicę przyłożyć w dwóch prostopadłych do siebie płaszczyznach po krawędzi rury głównej masztu balastowego.
- Trasowanie otworów na ścianie (po poziomicy). Jeżeli masz dwa wsporniki (góra/dół), trasuj oba po ustawieniu masztu w pionie.
- Wiercenie:
- Mur drążony/otworowany: wiertło do betonu, tryb rotacyjny (bez udaru), aby nie poszarpać cienkich ścianek. Średnica d0 = średnica z tabeli dla danej żywicy/pręta/koszyka.
- Mur pełny/beton: dopuszczalny udar. Trzymaj prostopadłość; nie „pompuj” wiertłem.
- Głębokość otworu h0 ≥ hef (dla koszyków – zgodnie z ich długością). Zaznacz markerem na wiertle żądaną głębokość.
- Czyszczenie otworu – klucz do nośności
Brudny otwór = słabe połączenie. Czyszczenie wykonaj tuż przed iniekcją. Problem częściowo omówiliśmy powyżej – to jeden z najważniejszych etapów na drodze do sukcesu. Pamiętaj, że otwór musi być suchy, przyczepny i niezaolejony. Niektóre sprężarki potrafią przez swoje nieszczelności mieszać sprężone powietrze z mgłą olejową, lub/i z mgłą z wody skondensowanej w akumulatorze ciśnienia. Unikaj obu tych sytuacji. Sprawdź, czy występują dmuchając sprężonym powietrzem na suchą chusteczkę z pewnej odległości przez kilkanaście sekund. Sprawdź, czy stała się wilgotna lub zaolejona. Kolejnym częstym problemem bywa zamoknięcie otworu na deszczu. Jeśli woda dostanie się szczególnie w litym betonie do otworu – wyklucza to poprawne wklejenie szpilki aż do pełnego jego wyschnięcia.
Procedura (uniwersalna):
- Sprężone powietrze: wsuń rurkę do dna otworu i wydmuchaj 2–4× na pełną długość (powietrze olejowe = zakaz). Parametry typowe: ≥ 6 bar, ≈ 6 m³/h. Dmuchasz aż zniknie pył z wylatującego z otworu powietrza
- Szczotkowanie: szczotka dobrana średnicą do d0; 2–4× pełny głębokościowo ruch „wkręcanie/wykręcanie”. Jeżeli nie czuć „oporowania” – szczotka za mała. Samo szczotkowanie nie jest zalecane i nie jest wystarczające by otwór wyczyścić, może być stosowane jako metoda wspierająca czyszczenie sprężonym powietrzem
- Ponowny wydmuch: do momentu, aż nie wylatuje pył.
Mur drążony/otworowany + koszyk: otwór również czyścimy (pył osłabia przyczepność koszyka do ścianki). Następnie wkładamy koszyk równo z licem muru.
Tip: Pompka ręczna wystarczy dla małych średnic (≤12 mm i płytkie otwory), ale przy większych średnicach i głębokościach koniecznie użyj kompresora.
6) Przygotowanie żywicy (kartusz)
- Załóż nowy mikser, nigdy go nie skracaj.
- Wyrzuć pierwsze porcje (kilka „strzałów”) aż kolor mieszanki będzie jednorodny.
- Jeśli montujesz wiele kotew – trzymaj kartusz w temperaturze roboczej (np. skrzynka termo), aby mieć powtarzalny czas żelowania.
Tip: Każda przerwa = ryzyko zastygnięcia żywicy w mikserze. Po dłuższej pauzie wymień mikser. Mikser w którym chemia zaczyna żelować stawia nieoczekiwany, większy niż normalnie opór. Jeśli to odnotujesz – wymień koniecznie.
- Iniekcja i osadzenie pręta
- Wypełnianie od dna: wsuwasz mieszarkę do samego dna otworu/koszyka i wycofujesz ją wraz z podawaniem żywicy, bez pęcherzy. Zwykle wypełnienie ≈ 2/3 objętości otworu. Zrób test (o ile masz wiele otworów) i zmierz ile pełnych strzałów spustem wyciskarki zapewnia ci ilość chemii która po prowadzeniu pręta gwintowanego nie wycieka w nadmiarze. Zapamiętaj tą wartość i powtarzaj dla kolejnych otworów.
- Osadzenie: wprowadź pręt ruchem obrotowym do znacznika hef – nadmiar żywicy ma wypłynąć przy wlocie (usuń go na czysto, gdy stężeje – możesz go też obić młotkiem, jeśli tego nie zrobisz, mocowanie masztu nie usiądzie równo na ścianie).
- Stabilizacja: jeśli otwór jest pionowy w górę – zastosuj korki/pistony lub tymczasowe podparcie pręta do czasu żelowania (w praktyce instalacji AluPro sytuacja w zasadzie nie występuje, ale warto o tej technice wspomnieć).
Tip: Zaznacz na pręcie kreskę hef – widać, czy pręt wszedł na pełną głębokość (kontrola jakości).
- „Świadek” – kiedy można obciążać
- Po iniekcji upuść porcję żywicy na taśmę malarską (albo kawałek blaszki) i opisz czas/temperaturę.
- Czekaj, aż „świadek” osiągnie twardość zbliżoną do docelowej (nie daje się zadrapać paznokciem lub śrubokrętem). Jeśli tak się stanie – możesz wstępnie obciążyć połączenie np. przez lekkie dokręcenie mocowania do ściany (palcami, lub kluczem z wyczuciem)
- Obciążanie docelowe dopuszczalne dopiero po czasie wiązania właściwym dla temperatury podłoża (zgodnie z kartą techniczną).
Tip: Zimą „świadek” może twardnieć wolniej niż żywica w głębi (tam cieplej). Nie przyspieszaj nagrzewnicą z bardzo gorącym strumieniem – ryzyko skurczów i spękań.
- Zima vs. lato – czasy pracy i wiązania (orientacyjne)
Przykładowa skala (typowe żywice vinylestrowe):
-
- +20 °C: czas pracy ~10–15 min, pełne obciążenie po ok. 60 min.
- +5 °C: czas pracy ~40–60 min, pełne obciążenie po 2–3 h.
- 0…−5 °C (systemy „zimowe”): czas pracy kilkadziesiąt minut, pełne obciążenie po 7–20 h.
Sprawdź tabelę producenta dla użytej żywicy. Czas zależy od temperatury materiału konstrukcji, nie powietrza.
- Montaż wsporników i masztu przyściennego na izolacji termiczne
Dla ścian ocieplonych sprawa instalacji nieco się komplikuje. Masz dwa rozwiązania – preferowanym jest zdjęcie ocieplenia (wycięcie pod mocowania), instalacja bezpośrednio do ściany, opiankowanie pozostałej dziury i odtworzenie warstwy elewacyjnej. Jeśli ten tryb nie jest możliwy dla jakiejkolwiek przyczyny – dla mniejszych masztów można zastosować tuleje dystansowe przechodzące przez warstwę izolacji o długości odpowiadającej dokładnie grubości docieplenia (nigdy nie zgniataj styropianu lub wełny mineralnej).
- Koszyki (tuleje siatkowe) – kiedy tak, a kiedy nie
- Stosuj (obowiązkowo): we wszystkich podłożach z pustkami (cegły/pustaki drążone, bloczki komorowe itp). Koszyk przekształca przyczepność „chemiczną” w zaczep mechaniczny w ściankach pustaka. Jest wiele ilustracji tego mechanizmu w materiałach produktowych producentów kotew.
- Nie są potrzebne: w betonie i murach pełnych, o ile ETA/producent tak określa.
- Materiał koszyka:
- Tworzywo/plastik – standard do mocowań w murze; lekkie, szybki montaż, bazowe modele są dość płytkie jak na potrzeby montażu masztów przyściennych – nie zalecamy ich stosowania, chyba że konkretny system pozwala na wydłużenie kanału do sugerowanych wartości.
- Metalowa siatka – polecana przez AluPro z racji dość dowolnego kształtowania długości kanału.
Dobór długości: koszyk powinien wypełnić strefę efektywnego zakotwienia co w praktyce przekłada się na głębokość odwiertu minus kilka milimetrów.
- Kontrola jakości i dokumentacja
- Zapisz: numer partii żywicy, datę ważności, temperaturę montażu, średnice i głębokości, momenty dokręcania nakrętek – przekaż te informacje Inwestorowi wraz z dokumentacją powykonawczą.
- Rób zdjęcia „świadka” i wypływów przy otworach (dowód wypełnienia).
- Przy większych obciążeniach – wykonaj test obciążeniowy kotwy na wyrywanie np. z użyciem wagi hakowej i wyciągarki ręcznej łańcuchowej. Uzyskaj maksymalny moment roboczy obciążenia kotwy (zgodnie ze statyką masztu) Naturalnie test wykonuj min. po 24 h od wykonania kotwień.
- Najczęstsze błędy
-
- Brak czyszczenia lub czyszczenie „na pół gwizdka”. Kończy się niską wytrzymałością, lub pręt gwintowany „wyjeżdża” z otworu w czasie próby dokręcania. Może też zacząć się obracać w otworze wraz z nakrętką.
- Wiercenie udarem w pustaku – poszarpane ścianki, słaba nośność. Do weryfikacji testem obciążeniowym.
- Brak koszyka w murze drążonym. Bardzo niebezpieczny błąd. Kotwienie pozornie „coś trzyma” ale przy realnym obciążeniu ma duże szanse na urwanie. Pośrednim problemem jest lanie kotwy w absurdalnie dużych ilościach w pustki w cegłach (niska efektywność kosztowa)
- Za krótki pręt (brak gwintu na nakrętkę) lub zbyt agresywne dokręcanie.
- Obciążenie przed upływem czasu pełnego wiązania. Nie jest to wielki problem, o ile mocowanie nie „puści” – wymiana zerwanego kotwienia jest dość trudna. Z reguły tracimy możliwość ponownego wykonania otworu o zadanej średnicy, zachodzi konieczność zastosowania grubszej szpilki.
- Szybka ściąga (checklista montażowa)
- System i dokumenty: wybrany system z ETA/DoP dla danego podłoża; spisz numer partii i datę ważności kartusza.
- Podłoże: zidentyfikowane (beton / mur pełny / mur drążony z typem bloczka). Dla drążonych — przewidziane koszyki/tuleje siatkowe odpowiedniej długości.
- Parametry kotew: dobrane M (np. M12), hef z tabel producenta, s/c (rozstaw i odległość od krawędzi) zgodnie z ETA.
- Wiercenie: średnica d0 i głębokość h0 ≥ hef; tryb wiercenia dobrany (rotacja w murach drążonych, udar dopuszczalny w betonie/pełnym murze); zaznacz markerem hef na pręcie i głębokość na wiertle.
- Unikanie słabych miejsc: nie trafiaj w spoiny i cienkie ścianki pustaków; w razie potrzeby skoryguj trasowanie.
- Czyszczenie otworu: wydmuch – szczotka – wydmuch (min. 2–4×), rurka do dna, powietrze bezolejowe; przy koszykach dodatkowo odpylenie ścianek. Zakaz klejenia na mokry otwór.
- Montaż koszyka (jeśli wymagany): osadzony równo z licem muru; dla większej głębokości łącz segmenty (plastik).
- Iniekcja żywicy: od dna otworu/koszyka, wypełnij ok. 2/3; kontrolny wypływ przy wlocie; nowy mikser; pierwsze porcje odrzuć do uzyskania jednorodnego koloru.
- Osadzenie pręta: wkręcaj ruchem obrotowym do znacznika hef; przy otworach „do góry” zastosuj korek/podparcie do czasu żelowania.
- „Świadek”: trochę żywicy na taśmie/blaszce z opisem temperatury; obserwuj utwardzenie.
- Czas wiązania: odczekaj do pełnej solidyfikacji próbki (inny czas zależnie od temperatury ściany i powietrza) — dopiero potem obciążaj/dokręcaj.
- Skręcanie: montaż stopy/wspornika, podkładka + nakrętka; moment dokręcania wg uniwersalnych tabel momentów dokręcania śrub.
- Dokumentacja: zdjęcia wypływów i „świadka”, zapis partii, warunków montażu, zastosowanych momentów.
Krótki poradnik dostępnych na rynku wersji kotew chemicznych:
1) Poliester (UP)
- Plusy: tania, szybkie wiązanie, dobry do lekkich i średnich obciążeń w murze pełnym i w pustakach (z koszykiem).
- Minusy: najsłabsza z „chemii”; gorsza odporność na temperaturę/płynięcie; zwykle brak aprobat na beton zarysowany.
- Warianty: ze styrenem (intensywny zapach, ograniczenia BHP/poż.) i bezstyrenowe (w stosowaniu).
2) Winylester / Epoxy-Acrylate (VE/EA) ← „podstawowy wybór”
- Plusy: bardzo dobra nośność, szybkie wiązanie, szeroki zakres temperatur, dopuszczenie na beton zarysowany, sejsmika C1/C2; dobrze znosi wilgoć.
- Minusy: droższa niż poliester;
3) Czysty epoksyd (EP)
- Plusy: najwyższe nośności i najlepsza odporność na płynięcie, świetny do głębokich zakotwień (pręty zbrojeniowe), wysoka powtarzalność; dopuszczony do otworów wilgotnych.
- Minusy: długi czas żelowania/utwardzania (godziny, a w zimnie – doby), najwyższa cena; wymaga dyscypliny temperaturowej.
4) Metakrylan metylu (MMA)
- Plusy: ekstremalnie szybkie wiązanie, działa także w niskich temperaturach (nawet <0 °C),
- Minusy: bardzo intensywny zapach, króciutki czas pracy (łatwo „przegapić” optymalny moment wklejenia),
5) Hybrydy
- Mieszanki (np. VE + dodatki mineralne). Zachowują się jak winylester — traktuj jak VE, patrz ETA danego produktu, nie nazwę.
6) Zaprawy cementowe iniekcyjne (mineralne)
- Nisza. Używane głównie do prętów zbrojeniowych w betonie przy dużych głębokościach i wysokich temp. Nie są „żywicą” w sensie chemicznym; do śrub gwintowanych i muru drążonego/pustaków stosowane rzadko.
Co wybrać do masztów przyściennych
- Mur drążony/pustaki + koszyk: VE (bezstyrenowa) → szybka, mocna, przewidywalna.
- Mur pełny/beton, standardowe obciążenia: VE.
- Beton zarysowany / duże obciążenia / wysoka temp. pracy / rebary: EP.
- Na zimę: MMA albo VE (w wersji zimowej).
- Budżet, lekkie mocowania w murze pełnym: poliester